
Showing posts with label series. Show all posts
Showing posts with label series. Show all posts
Sunday, April 10, 2011
WORKING IN A SERIES!

Friday, March 25, 2011
NEXT IDEA!


The last painting was more detailed than I really wanted, so I thought for awhile about a new approach. With the help of Photoshop Elements, I created a "notan" 2 value pattern. Using a failed painting, I drew the shapes of the light pattern on with a brush and gesso. Then I brushed a dark value of Dr. Martin's Hydrus over what was left. When that layer dried, I collaged some stamped collage paper over part of the painting, then covered the entire page with plain white tissue. So far I like the effect. I going to go slowly so I don't get too fussy.
Thursday, March 24, 2011
WITH A LITTLE HELP FROM MY FRIENDS!

I have been procrastinating finishing this painting because I was "stuck" It wasn't coming together in a way I was happy with but I couldn't figure out how to make it work. Things got so bad, I started cleaning house. My husband asked if we were expecting company. As it turned out, our grandson was on his way which was extra motivation to clean. I took the painting to my critique group this morning and their expert eyes gave me the information I needed. This was the extra motivation to paint! I was able to come home and finish it up. It feels good to be able to move on to the next one.
I hope all of you have a critique group to attend. I love seeing what others are doing and learn so much from everyone's comments about each painting that is presented. I also find it extremely helpful to hear what others see in my paintings. Because I know the intent behind each of my paintings, I don't always see what they see. I think I get eye fatigue, as well, where I don't notice every detail after looking at something for an extended period. I get by with a little help from my friends and I cherish them.
Thursday, March 17, 2011
EVER SO SLOWLY!


This painting is going much slower than I had hoped but it is coming along. I am using Dr. Ph Martin's Spectralite liquid acrylics and they have a very bright quality. Hopefully, I will be able to finish it up tomorrow. The weather report is for rain, perfect for staying inside and painting.
Friday, March 11, 2011
MOVING AHEAD!

I sat at the gallery today and took lots of art to work on. It was a very productive day. We had a fair amount of visitors for a change, including my friend, Bonnie, accompanied by Beth. Beth has a great sketch blog you can check out at http://bethbourland.wordpress.com/ What a wonderful surprise.
I found some different tissue in my supply bin. It is archival acrid free tissue by Lineco and it is stronger than what I normally use. I think I bought it because it was on Anne Bagby's DVD but I never used it. I was able to draw with a coffee stirrer stick on this tissue and I used red India Ink. Some went through the tissue and caused the paper to stick to the gator board in spots but it didn't tear when I carefully pulled it away. Here are the two drawings I did. I can move them around and even turn them over if I want to change the direction of some of them. I am excited about this way of trying out various compositions.

After I drew these images, I decided to paint on another page I had prepared a few days ago. This one is sharpie pen drawing on good quality tissue, collaged on top of an abstract collage design. I purchased some Dr. Ph Martin's Spectralite Liquid Acrylics and wanted to try them out. I like the paints very much. I added some white ink where needed. I'm not sure if I should cut this painting apart and mat each image separately. I may use a little gloss medium as it looks quite matte and I can't decide if like the contrast that exists now. Always so many little decisions.


Monday, March 7, 2011
DEMO FOR CAMBRIAN ART CLUB


I have to work flat so I am never sure how it looks until it is dry and I can stand it up. This was a good start but it needed some serious work. You can see the adjustments I made. I am happy with the final results.
Monday, February 21, 2011
A EUREKA MOMENT!
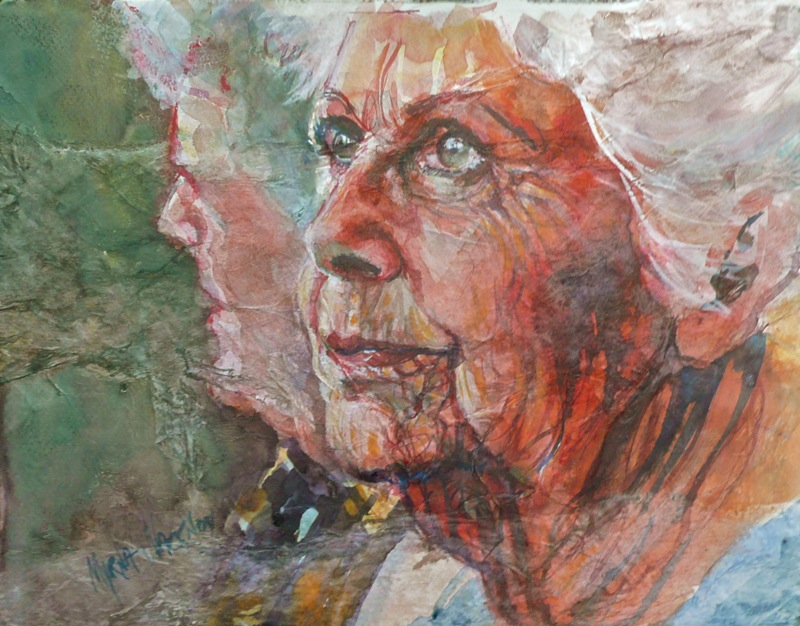
I think this is done. I was able to increase the saturation of color. It just took some layering. I am getting pretty tight with these paintings. I will probably proceed along these lines for awhile and then get more gestural when I have the literal out of my system.
So, what was the Eureka! moment? I often lie in bed and imagine how different ideas will look and then fall asleep. Often, the in the first waking moments, ideas pop into my head. The subconscious works on the problems and comes up with solutions. I have been trying to resolve a composition of multiple heads and hands, what size paper, what shape paper, etc. I like to just start drawing because of the spontaneity of the line and image but it is hard to control the composition when I work this way. It came to me that I could draw the images on tissue paper and then move them around until I found the most appealing composition and then collage them onto the paper. I am very excited about this idea. I want to use a color other than black, and using a stick with ink will probably be too rough on delicate tissue paper, so I think my Lizard's Lick #4 dipped in acrylic ink will do the trick. I'm looking forward to trying this idea out this afternoon. Stay tuned.........
Sunday, February 20, 2011
ONCE AGAIN, WITH A SMALL DIFFERENCE!


Saturday, February 19, 2011
EVELYN'S FRIENDS...first painting !

Thursday, April 29, 2010
UNDER THE WIRE!

Wednesday, April 28, 2010
DRAWING DONE & READY TO PAINT!

Along the way in sticking to this general idea for a series, I am learning lots of little helpful techniques and adding to my art knowledge bits and pieces at a time. I love that I make these small discoveries. Everyday there is something new which keeps life fresh and exciting. I can't imagine doing the exact same, safe thing over and over. I am fortunate that I don't have to in order to survive. If you have a choice, I hope you don't settle for "safe".
Monday, April 26, 2010
THE START OF SOMETHING KNOWN BUT NOT KNOWN!

Wednesday, March 31, 2010
IT'S DONE...NO FOOLING!

My critique group acts as my expert eyes. Often, they see something I missed. Sometimes their opinions are different from mine and I am not swayed. Either way, I find it very helpful to know what others see and I value the knowledge at expertise from each of them. Thursday morning we gather to share the week's efforts. Right now, I feel this piece is finished. I am happy I managed to keep much of the transparency of the background pieces. I was particularly delighted where some of the pattern fell on the face in a serendipitous way (beside the eye and crease down from the nostril)
Saturday, March 27, 2010
PUTTING IT ALL TOGETHER!


I started to get nervous about proceeding with my idea. How would it look? I would hate to ruin all these drawings if my concept turned out "not so much"! I am usually impatient and rush ahead, but today I decided to try a smaller version (15 x 15) to see the visual effect before I tackled the large (30" x 30") version. Glad I did! First off, I realized I needed to spray the papers with acrylic to keep some of the ink from smearing. Not all of the drawings were done with permanent ink. I had forgotten that little detail!

I added tissue paper over the top after collaging the drawings down. I purposely added a some gesso stamped tissue in a few places to see what the effect would be. It obscures the drawing too much. I will leave that out of the large version.

After the collage paper was dry, I drew an image in ink with a stick. I didn't think the line was strong enough against the background, so I went over it with the wide Copic marker.
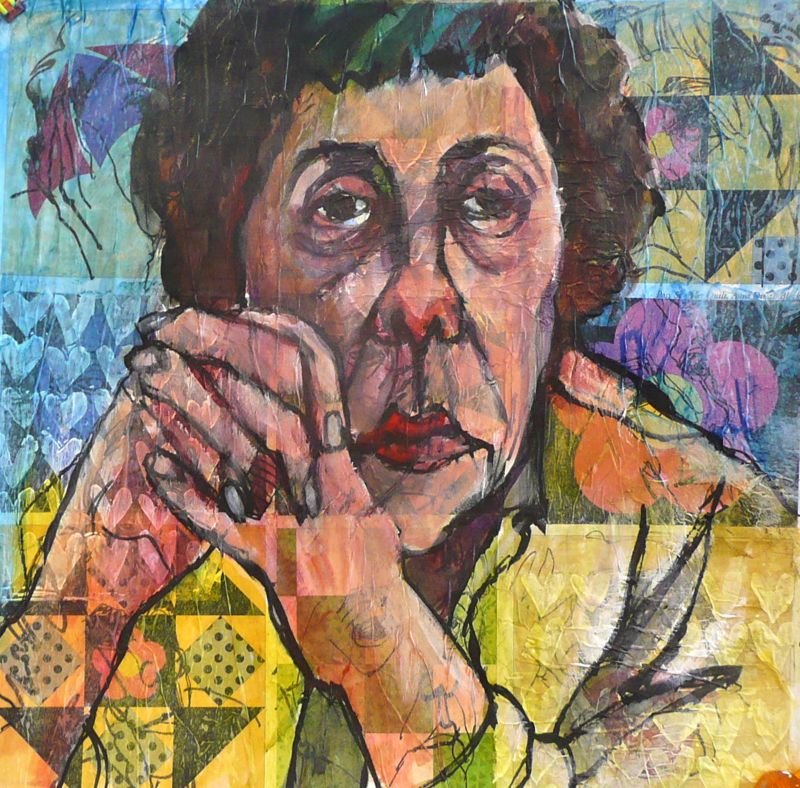
I finished the painting with acrylic used in a transparent way. I added some white gesso to recapture some lighter values. These areas become more opaque but you can still see some of the background influences.
Final evaluation: Like the overall idea. I need to be a little more careful in my drawing so it doesn't get so "cartoon" like. I find the heavy dark line a bit too strong. I think I can tackle the larger painting with confidence now that I have worked out my strategy.
Tuesday, February 9, 2010
DO OVER!


 I appreciated all the positive comments on this piece but I had to follow what my own internal voice was telling me. Interestingly, I was listening to a book on tape while I was painting this and it was a very dark, suspenseful story by Daphne Du Maurier called "Jamaica Inn". I think something of the mood of that story invaded this painting! I will be more thoughtful in my choice of listening material depending on what mood I want to inject. Anyway, I decided to scrub off as much of the paint as possible and then collage torn tissue paper over the top. After that layer dried, I attached a turquoise brush pen to a long stick and redrew the image. By having the pen extended far out this way, I had less control over the drawing and it made for a looser, more interesting line. I am hoping to paint it in the same, loose style instead of tight and controlled.
 Last night I had the pleasure of being the guest demonstrator for the Livermore and Pleasanton art societies. There was a nice crowd and a few familiar faces. Lots of energy and good questions while I worked. I need to complete the painting, hopefully tomorrow, and then I will post the results.
Sunday, February 7, 2010
BLEEDING HEART: FINAL VERSION COMPLETED!


I think this painting is finished. At least I am finished messing with it. I was surprised I was able to make some major changes, repositioning the eye on the left significantly. Gesso is magic stuff! I have posted the finished painting along with the previously published start to show the difference. I struggled with the eyes on this one. I don't think they are perfect but are close enough, I was able to shorten the nose and change the mouth so that all the features seem to work together in a natural way. I also had to enlarge the dangling hand and lengthen the finger on the supporting hand.
I do like how the patterned paper comes through in different areas. I attempted to have a looser feel to the painting by leaving some of the drips. Overall, I like this painting. I was ready to cover it up and totally start over, but the encouragement from many of the comments helped me to work through the problems. I want the next one to be in a much looser style. I have it planned in my mind's eye. It will be fun to see how close I get to my intention.
Wednesday, January 27, 2010
CONTINUING WITH THE SERIES...NEW PAINTING STAGE 1

I was looking forward to getting back into the studio...well maybe not in the studio exactly because it is slightly trashed, so I worked in the dining room to mark the shapes and cut the hand painted collage tissue paper. I glued it down in the studio (that's the stage shown here) and then I moved to the kitchen, drew the image on with charcoal and started to paint. Hopefully, I will be able to work on it tomorrow. This is the second painting on a sheet 30" x 30". It's going to be another scary big face!
Wednesday, December 16, 2009
FINE TUNED AND READY TO MAT!

I think this is finished, now. You may not be able to see any changes, but it is the little touches here and there that can make the difference. I fixed a few highlights, corrected the shape of the lips, changed the color of the shadow under the nose, softened a dark shadow by the nose and integrated the garment with the rest of the painting. This image is the closest to accurate color of the actual painting, but it seems to be impossible to get it perfectly matched. For my purposes, this is good enough.
Someone suggested a slide show of the steps to this painting and I liked that idea. I hope this inspires you to rework a piece of watercolor paper into something totally different.


Sunday, November 22, 2009
2 DOWN, 18 TO GO!


Continuing with my series, here is the final result of today's work. I created a slide show of the steps. I included some details as well. I am really enjoying working in a vertical position. I can see accurately and can step back periodically and take a better look. I also like letting gravity do it's job. I made some changes in this collage. I started with the printed instruction and then drew the image with a fine brush and Venetian Brown Hydrus liquid paint. I was surprised it didn't run and stuck to the surface well. Since I had used undiluted mat medium to stick the paper down, I wasn't sure the watercolor would take. The next step was adding some of the tissue pattern. While I was doing this, the idea of paper dolls popped into my head, so I cut a doll chain from tissue paper and stuck some of those down. I liked how this looked. In the end, you really don't see them. I did do some negative painting around them with the Venetian brown but it all pretty much disappeared in the end. I decided to do an overall wash of diluted gesso to push back the importance of the printed paper. While the paper was still damp, I redrew the lines with a Daniel Smith watercolor stick and then started painting. I think I have found the perfect way of working with these paint sticks. I can draw and paint at the same time. I really loved being able to work this way! The line quality was interesting because it dragged in places that were dry. I could also wet it and blot to lift back if I got too much color on because of the mat medium coated paper. I decided not to use a black line this time. I am happier with the more colorful version. Not much evidence of a grid. I will emphasis that more in future pieces. Overall, I think this was a successful days work.
Saturday, November 21, 2009
START OF NEW SERIES!


I created some new self portrait photos the other day using the camera built into my MacBook. The program is called "Photobooth" I used one for the demo yesterday and had fun with the hands, so I decided to start a new series of paintings using some of these photos and focusing on collage and exploring manipulating an underlying grid. I plan to do 20 paintings in 10 weeks but most of them will be half sheet size rather than full sheet. If something really special shows up, I will do one in full sheet. I did this painting in a few hours today, so I think I can meet this 2 a week goal.
I started with a charcoal drawing on hot press 140lb watercolor paper. I wanted a loose spontaneous drawing so I drew directly on the paper keeping my composition in mind and praying that it would land in the right place! I did pretty well with that. I can make some minor adjustments in placement when I put it under a mat. I did this entire painting vertically on an easel. So much better visually than laying flat on the table.
A friend gifted me with some very old sewing patterns. They make fascinating collage material. This is a Vogue pattern from 1950. I was surprised to see only punch holes and punched words on the pattern pieces....no printed lines! I love all the holes! The tissue had a slight green cast to it. The shapes of the pattern pieces were great to work with. I overlapped some of the pieces to create a grid pattern. I finished up the painting with liquid watercolor, Stabilo watercolor crayons and diluted white gesso.
You can see the influence of the layered pattern pieces through the painting. It is subtle. The hands came out fairly clumsy looking. I will pay more attention to them in the next painting and improve their shapes. This first painting led me to think of 3 more variations to try. I am keeping a list so as not to forget. Thoughts are so fleeting these days!
Subscribe to:
Posts (Atom)


